You love your gel false nails, but the time has come to remove them. Don’t panic! With a few simple steps and a little patience, you can get your nails back to their natural state without damaging their health. In this post, Maryton will show you the best tips for easily removing your gel nails at home.
Necessary preparation before removing the gel
To remove gel from nails more easily, nothing beats good preparation! These small steps allow you to have less effort to make later.
Have the right tools
To get started, make sure you have all the necessary equipment on hand. You will need:
- A nailfile
- A nail clipper
- A buffer block
- Cotton pads
- Pure acetone
- Aluminum foil
- A wooden stick or a cuticle pusher
Step 1: File the gel
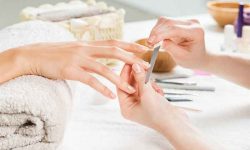
The first step is to remove the old top layer of gel. Use the coarse file to reduce the thickness of the gel on the nails. File until you reach the natural color of the nail.
Proceed gently so as not to damage the natural nails. The key is patience! If you have an electric nail file, this step will be faster, but still make sure to use delicate movements.
Step 2: Soak in acetone
Now for the key step of the process! Using acetone allows you to remove your gel easily.
Preparation for the soak
For this step, you will need to use pure acetone. Pour a small amount of acetone into a sturdy bowl. Then dip each cotton pad in the acetone and place them directly on each nail.
Wrap each nail with a square of aluminum foil to hold the acetone-soaked cotton pad in place. This will allow the product to penetrate the gel and soften it.
Waiting time
Let it sit for about 15 to 20 minutes. During this time, avoid using your hands to avoid disturbing the process.
Step 3: Removing the softened gel
After the soaking time, carefully remove the aluminum foil and cotton pad. The gel will have softened thanks to the acetone. Using the wooden stick or cuticle pusher, slowly remove the softened gel, being careful not to apply too much pressure.
If the gel does not come off easily, do not force it! Reapply acetone and let it soak for a few more minutes before trying again.
Step 4: Hydrate and care for your nails
Once you’ve removed your gel, it’s essential to take care of your nails.
Clean and polish
Once all the gel is removed, clean your nails to remove any acetone and gel residue. Use a buffering block to smooth the surface of your nails and remove any remaining unevenness.
This cleaning is essential to prepare your nails for nourishing treatments or a new application of polish.
Hydrate your nails
Acetone can dry out your nails and cuticles. Apply a nourishing oil or a specific nail moisturizer to counteract this drying effect. Gently massage each nail and cuticle to promote blood circulation and strengthen the health of your nails.
Read also: What is the right length for your nails?


